Key Takeaway: Automotive air conditioning systems operate as hermetically sealed loops. When a system emits warm air, the root cause is typically a low refrigerant charge resulting from a structural or component leak. Simply recharging the system without performing a diagnostic leak test fails to resolve the underlying failure and allows atmospheric moisture to enter, which causes catastrophic compressor damage.
Understanding the Closed-Loop Design of Automotive A/C Systems
An automotive air conditioning system is a closed loop designed to isolate and circulate refrigerant under varying pressures to facilitate heat transfer. The system does not consume refrigerant during operation. Therefore, any drop in refrigerant levels indicates a mechanical breach or seal failure within the circuit.
The Refrigeration Cycle Mechanics
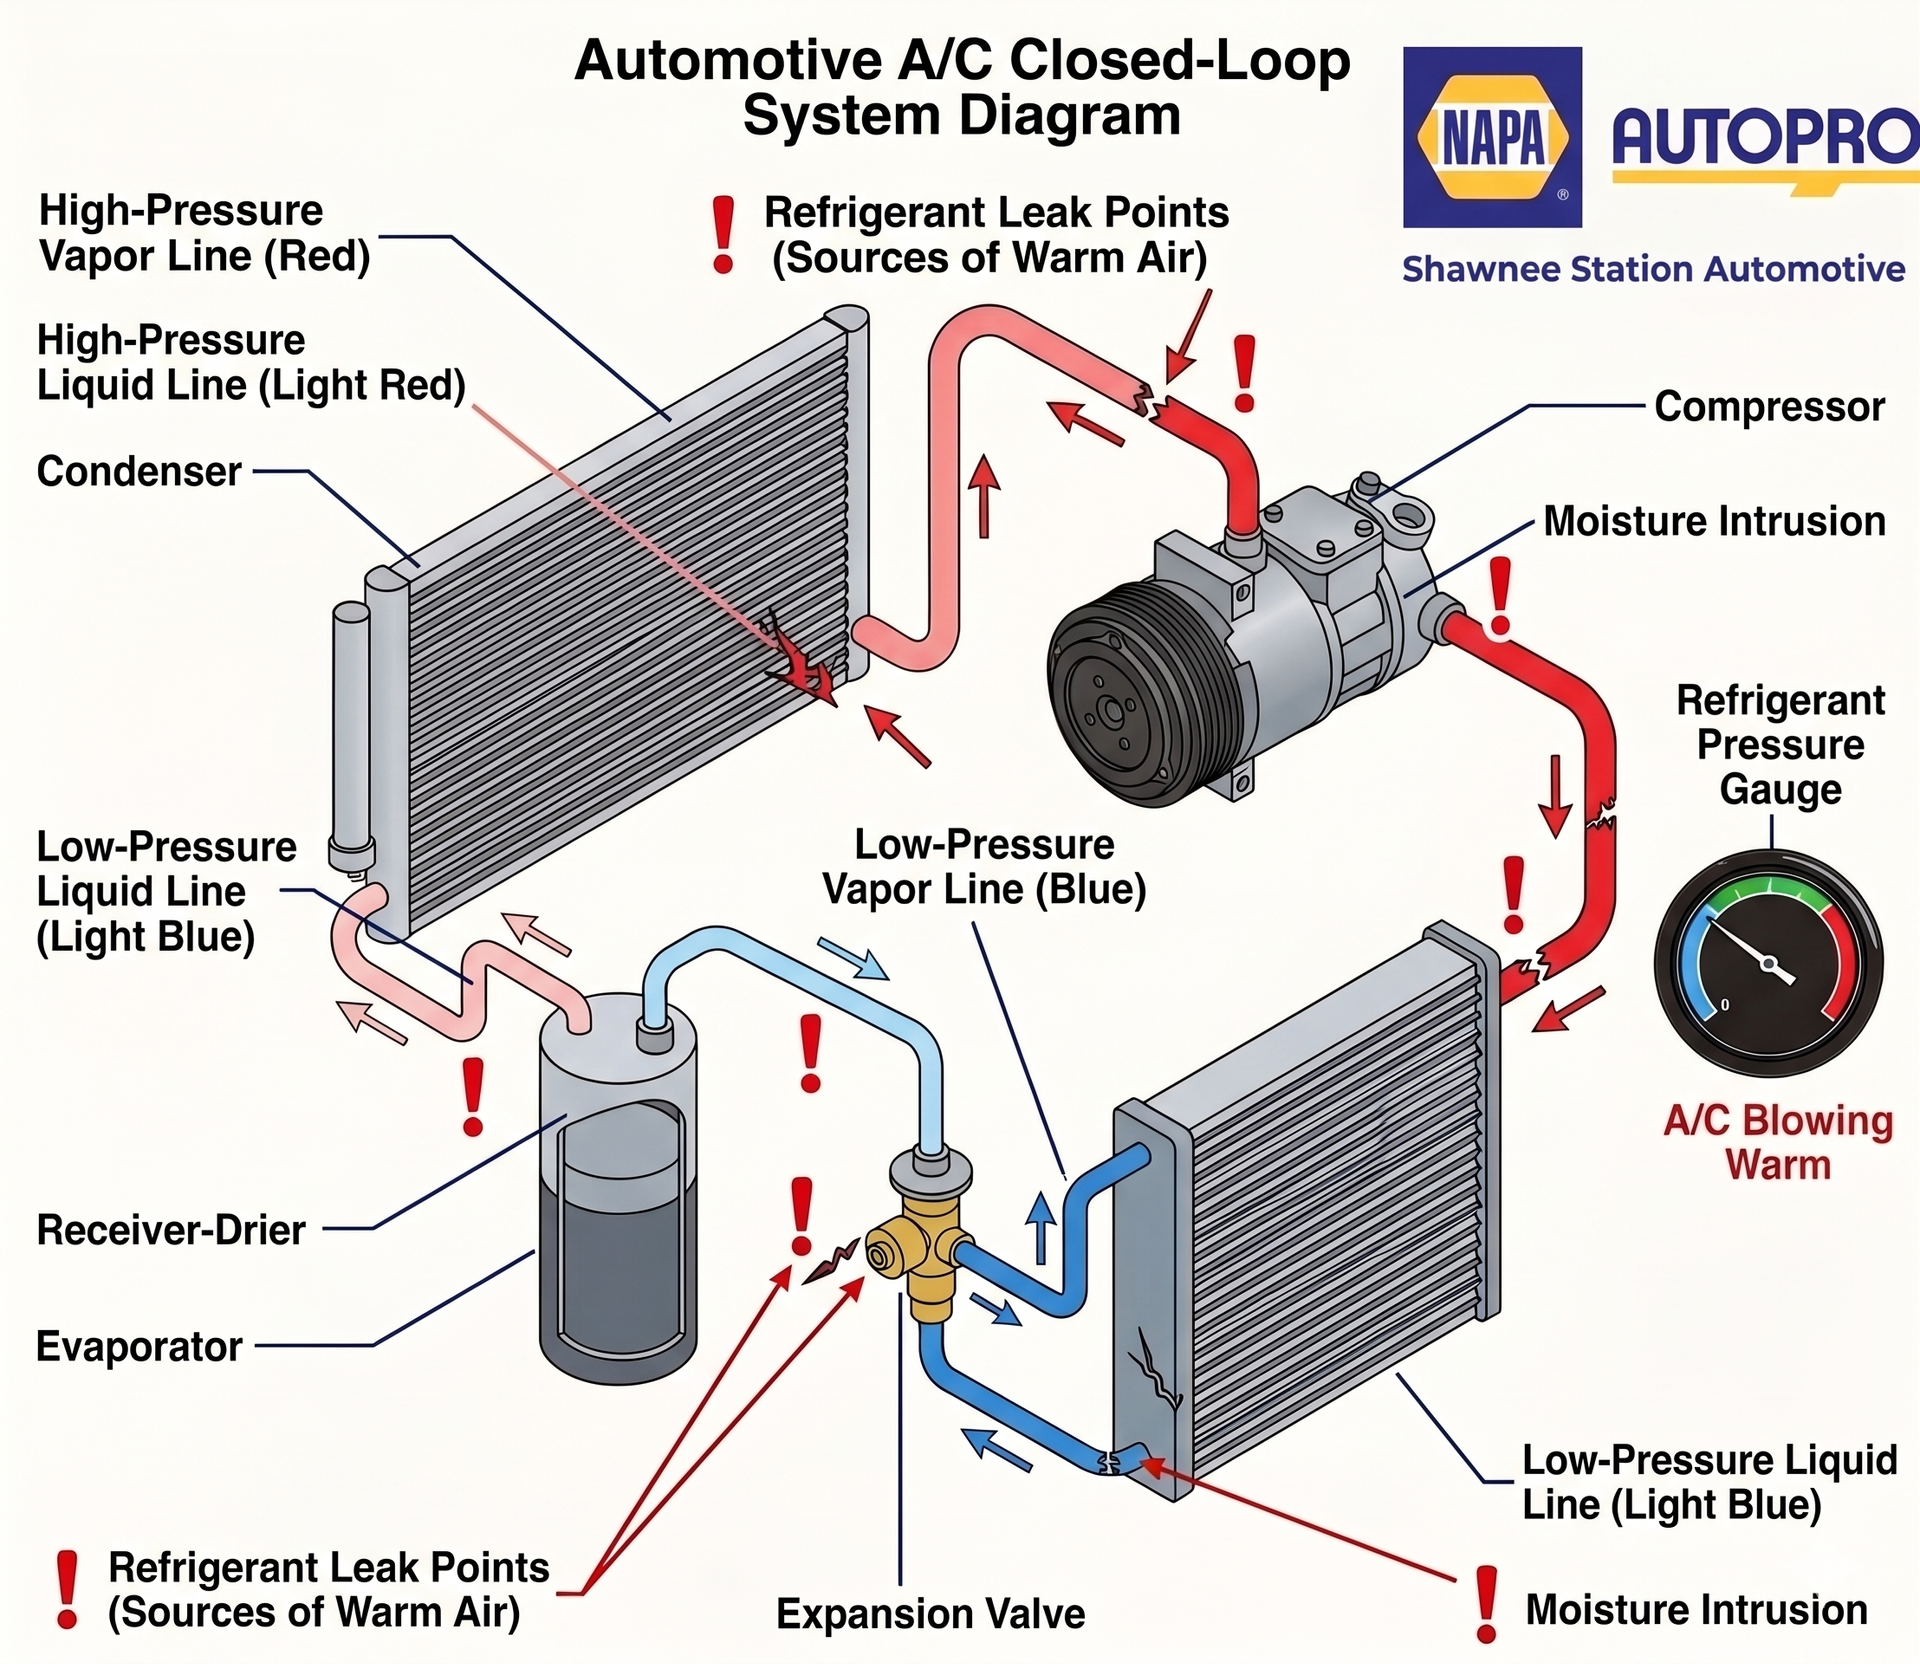
The cooling process relies on precise thermodynamic principles to absorb heat from the vehicle cabin and reject it into the atmosphere. The cycle relies on five core components:
- The Compressor - This component draws in low-pressure, gaseous refrigerant and compresses it into a high-pressure, high-temperature gas.
- The Condenser - Mounted at the front of the vehicle, this heat exchanger cools the high-pressure gas, causing it to condense into a high-pressure liquid.
- The Receiver-Drier or Accumulator - This canister filters out debris and utilizes a desiccant material to absorb internal moisture.
- The Expansion Valve or Orifice Tube - This metering device regulates the flow of refrigerant, drastically dropping its pressure as it enters the low-pressure side.
- The Evaporator - Located inside the dashboard HVAC unit, this component absorbs heat from the cabin air as the low-pressure liquid refrigerant boils back into a gas.
Why Recharging a Leaking A/C System Is a Temporary and Costly Error
A simple refrigerant recharge involves adding gas to a low-pressure system to restore temporary cooling performance. This practice does not address the structural opening that allowed the original refrigerant to escape. Because the system remains unsealed, the newly introduced refrigerant will inevitably escape at a rate determined by the size of the breach.
Simple Recharge Versus a Professional Leak Test
A clear technical distinction exists between merely filling a system and performing a comprehensive diagnostic leak verification.
| Metric / Procedure | Simple Refrigerant Recharge | Professional Leak Test and Repair |
|---|---|---|
| Primary Action | Adding refrigerant until pressure thresholds are met. | Evacuating the system, vacuum testing, and identifying breach points. |
| Root Cause Resolution | None. The underlying structural failure remains unaddressed. | High. Detects worn seals, fractured lines, or failed components. |
| Long-Term Cost | High. Requires repeated recharges and risks component failure. | Low. A single repair stops refrigerant loss permanently. |
| Environmental Compliance | Low. Directly allows regulated chemical compounds to vent into the air. | High. Prevents the unlawful release of greenhouse gases. |
Diagnostic Methodologies for Leak Detection
Automotive technicians utilize precise diagnostic protocols to identify the exact source of a refrigerant leak before performing repairs.
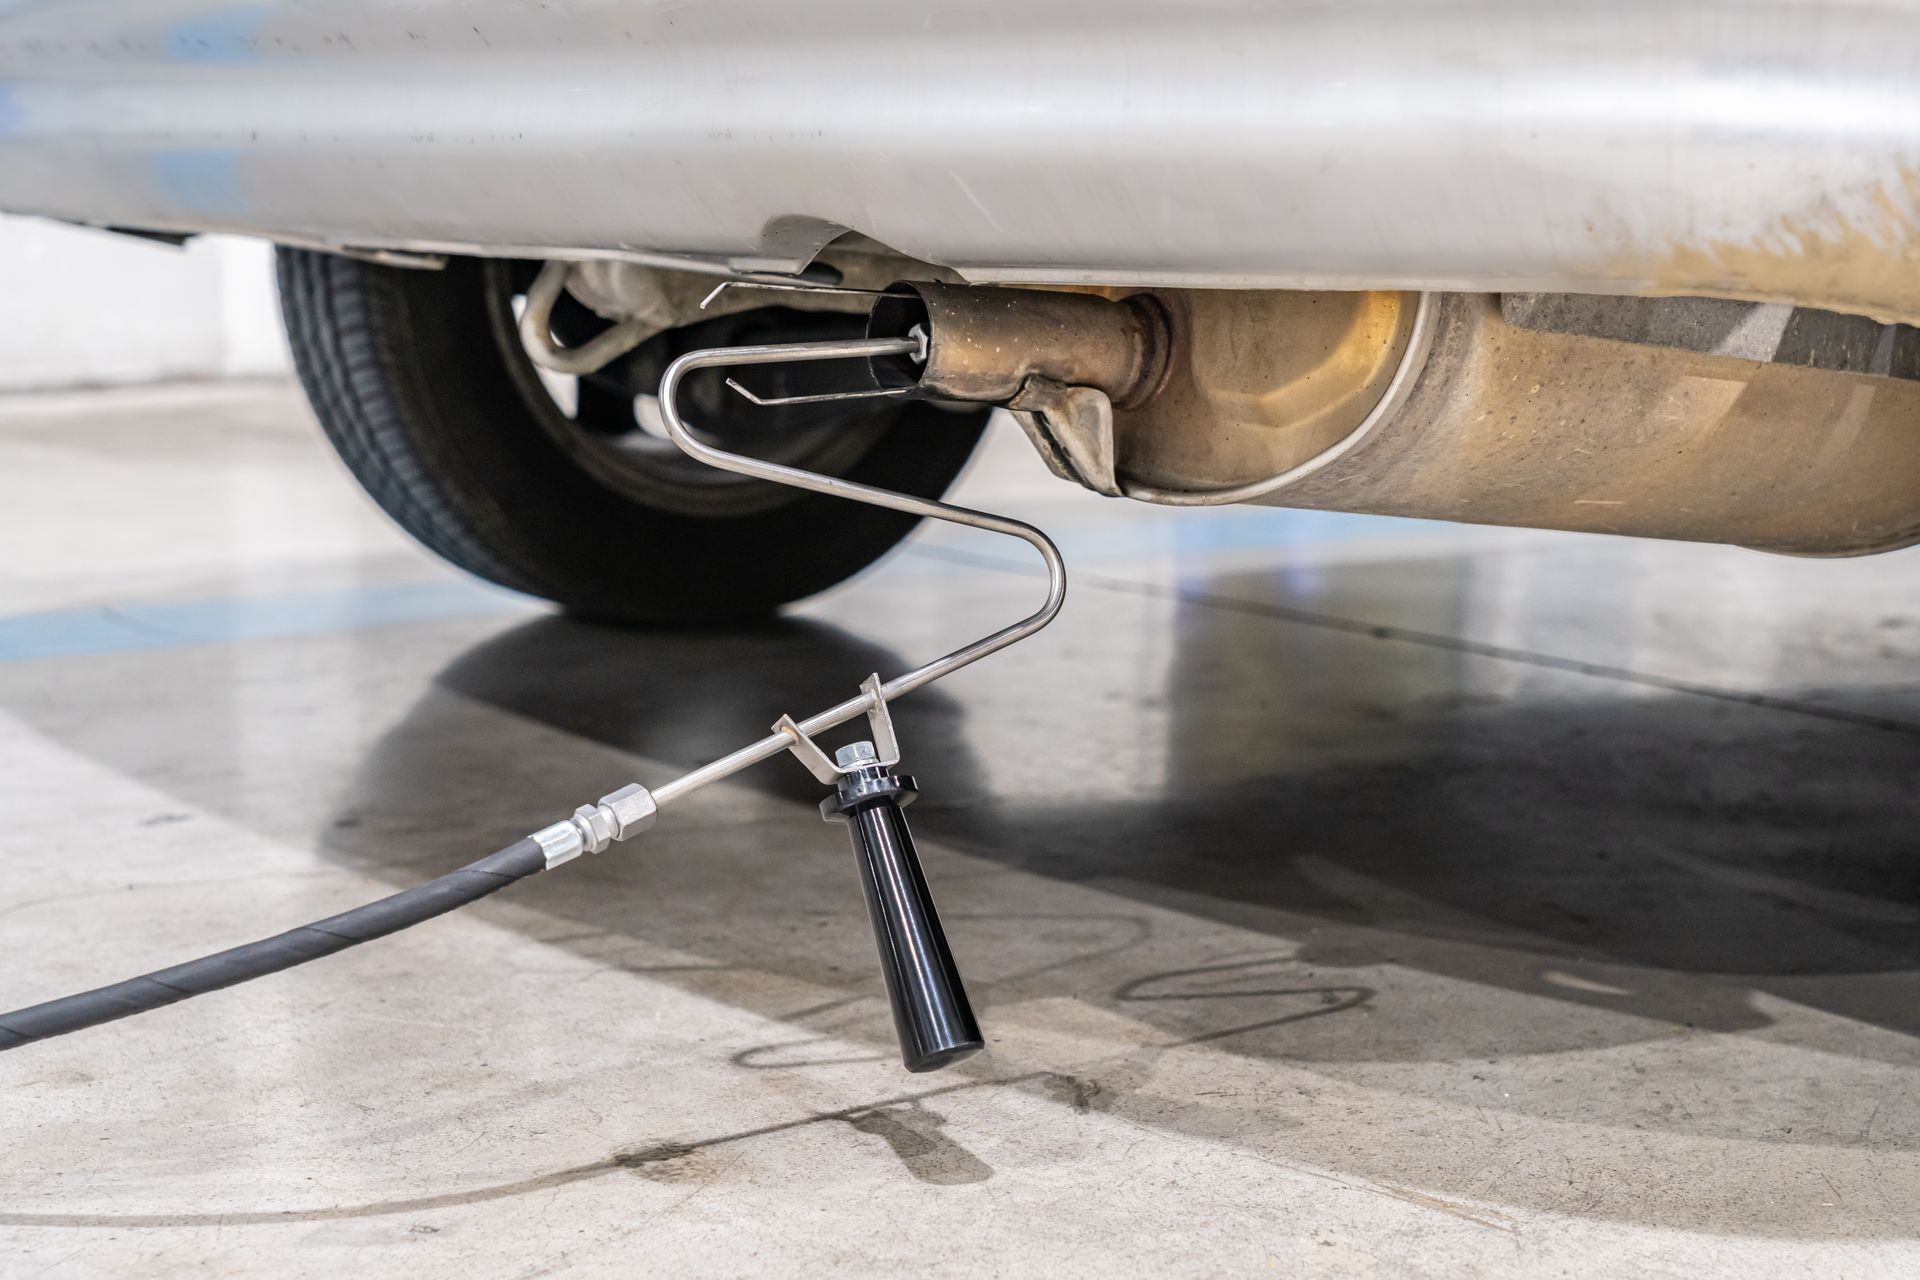
- Electronic Leak Detection (Sniffers) - Handheld electronic tools contain sensors tuned to detect the chemical signatures of halogenated gases. Moving the probe along lines, connections, and the evaporator drain allows technicians to isolate microscopic gas escapes.
- Ultraviolet (UV) Dye Injection - A specialized fluorescent dye is introduced into the system alongside the refrigerant. The system is run to circulate the dye, and a technician uses an ultraviolet light and yellow tinted glasses to spot fluorescent tracking marks at the leak site.
- Vacuum Decay Testing - A recovery machine evacuates all air and moisture, pulling the system into a deep vacuum of approximately 30 inches of mercury ($30\text{ inHg}$). The system is isolated to monitor if it can hold this negative pressure over a specific duration; a loss of vacuum confirms a leak.
How Moisture Accumulation Causes Compressor Failure
Atmosphere contains ambient moisture that enters the air conditioning loop whenever a leak reduces internal system pressure below atmospheric pressure. The chemical interactions between ambient moisture, specialized lubricants, and chemical refrigerants create highly destructive conditions inside the closed loop.
Chemical Transformation and Acid Formation
Automotive A/C systems use synthetic lubricants, such as Polyalkylene Glycol (PAG) oil, to lubricate the high-speed internal moving parts of the compressor. PAG oil is highly hygroscopic, meaning it actively absorbs moisture from the surrounding air. When water mixes with PAG oil and refrigerant under high operating temperatures and pressures, a chemical hydrolytic reaction occurs. This reaction produces highly destructive hydrochloric or hydrofluoric acids inside the loop.
Mechanical Failure Modes Induced by Moisture
The introduction of water and the subsequent formation of acid alter the physical properties of the system components, resulting in mechanical breakdowns.
- Internal Corrosion - The acidic byproduct etches metal surfaces inside the compressor, creating microscopic pits on pistons, cylinder walls, and reed valves. This degrades sealing capabilities and drops volumetric efficiency.
- Lubrication Breakdown - Moisture reduces the viscosity and load-bearing capacity of the PAG oil. The resulting metal-to-metal contact accelerates friction, generates severe heat, and eventually causes the compressor to seize completely.
- Orifice Tube or Expansion Valve Freeze-Ups - As moisture circulates through the low-pressure side, it passes through the expansion device where temperatures drop rapidly. The water freezes instantly into ice crystals, completely blocking refrigerant flow and halting all cabin cooling.
The Role of the Cabin Air Filter in System Performance
The cabin air filter is a pleated filtration media positioned within the HVAC housing. It acts as a physical barrier that cleans the air before it passes through the evaporator core and enters the passenger compartment.
Airflow Restrictions and Thermal Efficiency
A heavily contaminated or clogged cabin air filter creates severe static pressure resistance within the ventilation ducting. This restriction limits the volume of air passing across the fins of the evaporator core.
Because the evaporator relies on continuous airflow to transfer cabin heat into the liquid refrigerant, a drop in airflow prevents this energy exchange. The refrigerant remains excessively cold, which can cause the condensation on the exterior of the evaporator fins to freeze solid. This icing creates a physical block that completely stops air from reaching the cabin vents.
Odor Generation and Microbial Proliferation
The exterior surface of an operational evaporator core is consistently damp due to atmospheric condensation. This dark, humid environment is a prime breeding ground for biological contaminants.
- Microbial Accumulation - When a cabin air filter fails to capture organic dust, pollen, and spores, these materials adhere to the wet evaporator fins.
- Decomposition and Odor - The organic matter decomposes over time, producing mold, mildew, and bacterial cultures.
- Cabin Delivery - The blower motor pushes air past this biological growth, delivering musty, stale, or sour odors directly into the passenger cabin.
Frequently Asked Questions
Why does my car air conditioner blow cold air at first and then turn warm?
This symptom usually indicates that moisture has entered the system or the evaporator core is freezing over. When moisture enters a leaking system, it circulates until it reaches the expansion valve or orifice tube. The intense cooling at this restriction point freezes the moisture into ice, which blocks the flow of refrigerant and stops the cooling cycle. Once the vehicle sits and the ice melts, the cycle repeats.
Is it normal for an automotive A/C system to require a recharge every year?
No. An automotive air conditioning system is completely sealed and does not consume or burn refrigerant during regular operation. If a vehicle requires an annual recharge, it has a verifiable mechanical leak that requires a diagnostic evaluation and physical repair.
Can a dirty cabin air filter cause the A/C compressor to stop working?
Yes. A severely clogged cabin air filter restricts airflow across the evaporator core, causing the core temperature to drop below freezing. This drops system pressures significantly. The low-pressure safety switch detects this drop and disengages the A/C compressor clutch to prevent mechanical damage from liquid slugging.
What is the danger of using DIY aerosol refrigerant cans with stop-leak additives?
DIY aerosol cans containing chemical "stop-leak" additives pose significant risks to automotive A/C components. These chemical sealants react with moisture at the leak site to form a hard patch. However, they also react with internal moisture throughout the loop, creating gummy deposits that clog the small passages of the expansion valve, orifice tube, and condenser. Furthermore, these additives contaminate professional recovery equipment, making future repairs far more expensive.
How often should a vehicle cabin air filter be replaced to maintain proper A/C function?
Most automotive manufacturers recommend replacing the cabin air filter every 12000 to 15000 miles, or at least once per year. Vehicles operated in high-dust regions, unpaved roads, or areas with heavy seasonal pollen may require replacement every 6000 miles to prevent airflow restrictions.